A unique Point Cloud workflow - V21
What’s New for Point Clouds in BricsCAD V21?
Point clouds remain a firm favorite in the Bricsys offices. The technology is still in its infancy, so the possible applications for point clouds are still being discovered.
Keep reading to discover the new features "point cloud" features for BricsCAD V21.
BUBBLE VIEWS
Bubble Views are a hot new feature for BricsCAD V21. Bubble Views represent the location the scanner was placed during the point cloud creation. The locations are indicated with little green spheres or “bubbles”, throughout the point cloud. Bubble Views can be used to navigate through a point cloud. They also form an important part of automatic geometry creation.
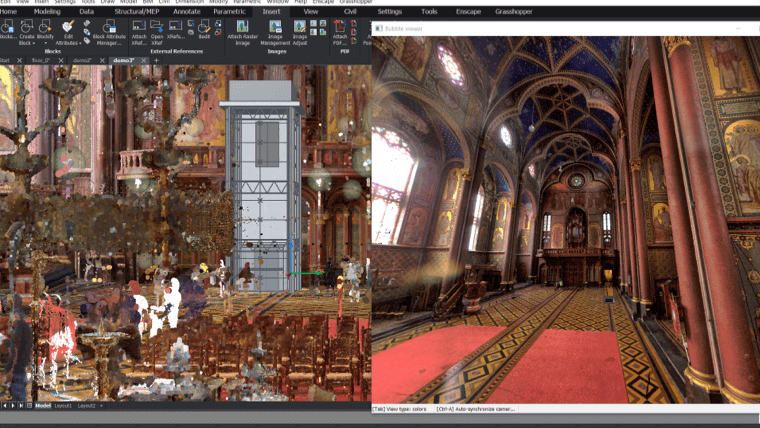
Click on the bubble to open a pop-up window to get a scan-eye-view of the point cloud. Whilst inside the view you can drag and scroll around the view. You also have the option to switch between 3 visual styles (use the Tab key). UCS colors indicate if a surface lines up with the X Y and Z coordinate system. The depth visual style shows points that are further away in increasingly darker shades of grey.
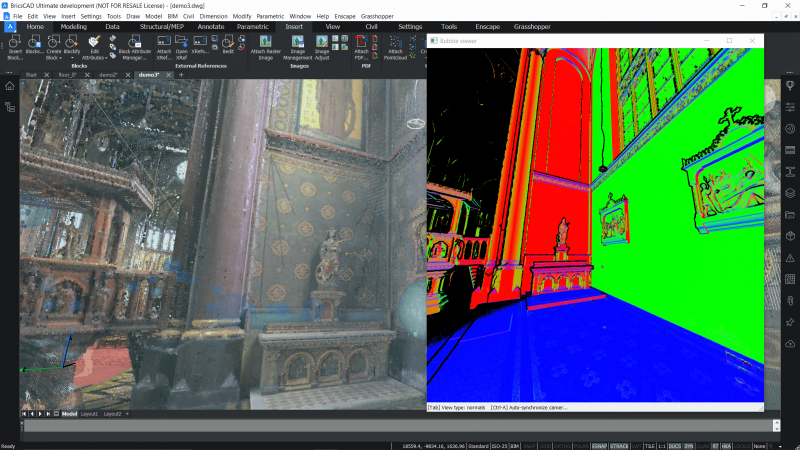
Bubble Views also have a nifty little feature: hit Ctrl to match the model space view with the current Bubble View.
SCAN-TO-BIM
In 2019 Bricsys announced its partnership with sister company; Leica on it Scan-To-BIM initiative. Throughout 2020 the teams have worked closely together to develop BricsCAD’s Scan-to-BIM technology. In BricsCAD BIM V21, you can now automatically generate 2D and 3D geometry, and raster images, all from a point cloud.
AUTOMATIC STORY DETECTION – BIM
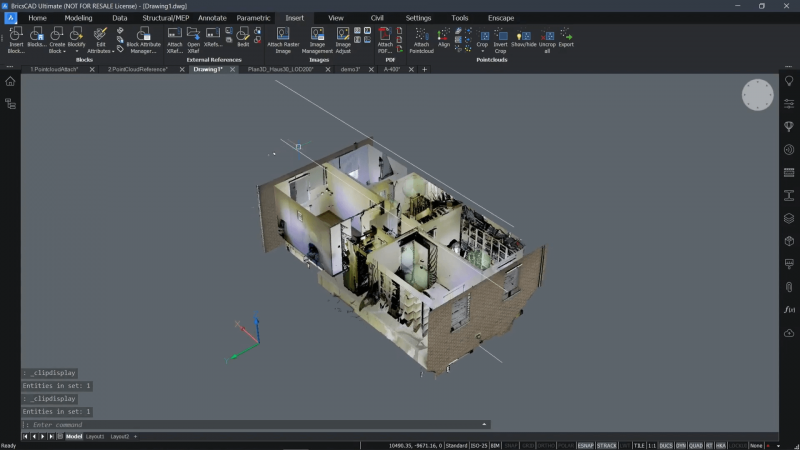
Use BricsCAD BIM V21 _PointCloudDetectFloors command to automatically detect the floors, of a building, directly from the point cloud. BricsCAD automatically creates a volume section for each of the detected floors. This volume section can be used to clip all elements in your drawing, not just the point cloud.
AUTOMATIC LINE DETECTION
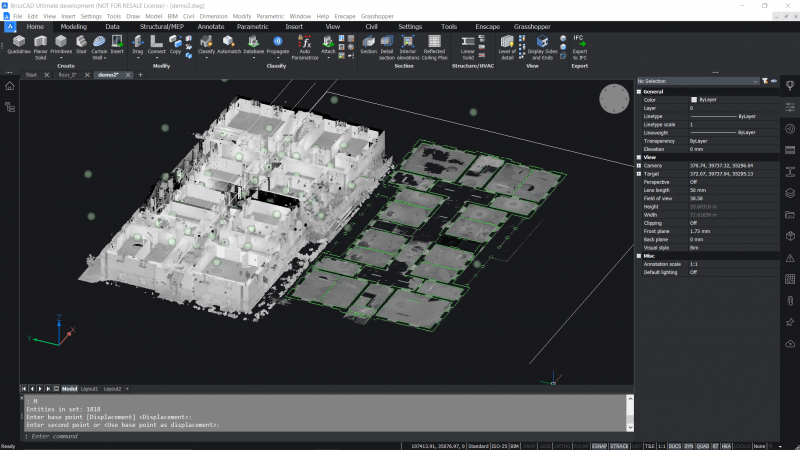
From these automatically created section views (or any that you create manually yourself) you can use the PointCloudProjectSection command to automatically generate 2D plans, linework and generate raster images. Combine this with our new optimization toolset to make short work of floor plan creation or use Quickdraw to quickly convert it to a 3D model.
It is also possible to use this command to detect windows and doors using the “across volume” option.
AUTOMATIC PLANE DETECTION
Use the new FitPlanar command, to detect and generate both surfaces and solids from a point cloud. Simply launch then command and use BricsCAD’s smart algorithms to generate surfaces at the click of a mouse.

FitPlanar works in both Bubble View and in Model Space. Once the surfaces are created you can clean up your model with the newly improved L-Connet tool.
Once again, it’s also possible to detect the opening of windows and doors. Use the Ctrl key to cycle through the options.
SPEED
Functionality is great, but what you really want is a faster system. The good news is that, in BricsCAD V21, point cloud import is more than 5 times faster, thanks to multi-thread point cloud processing.
There is also a progress bar, so you can see the status of your import and the whole process happens in the background, which means, while it’s processing, you can continue to work on your drawings.
ESNAP – PRO
BricsCAD V21 also brings a new Esnap option: Point Cloud closest point. This option ensures that the cursor will automatically snap to the closest point cloud point, making working with files that contain point clouds and additional elements, much easier.
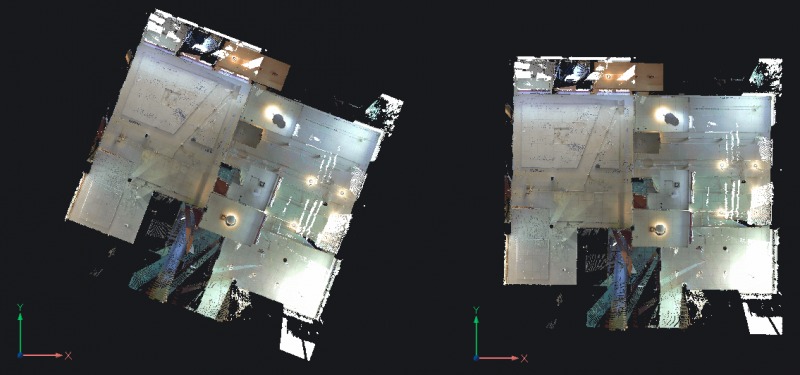
ALIGN POINT CLOUDS WITH DRAWING COORDINATE SYSTEMS
Use _PointCloudAlign to rotate a point cloud to algin with the drawing coordinate system. You can do this manually or use BricsCAD’s point cloud engine to detects the walls, and re-orients the point cloud automatically.


